Appendix D.Swagelok Tube Fitting
These instructions apply to 25 mm (1") and smaller fittings.
1.Fully insert the tube into the fitting until it bumps against the shoulder.
8:
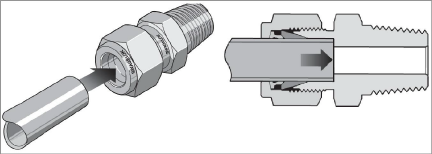
Figure 8: Tube Insertion
2.Rotate the nut until it is finger-tight. For high-pressure applications as well as high-safety-factor systems, further tighten the nut until the tube will not turn by hand or move axially in the fitting.
3.Mark the nut at the six o'clock position.
9:
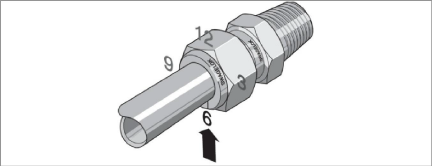
Figure 9: Make a Mark at Six O’Clock
4.While holding the fitting body steady, tighten the nut one and one-quarter turns until the mark is at the nine o'clock position.
Note: For ¹⁄₁₆", ⅛", ³⁄₁₆", and 2, 3, and 4 mm fittings, tighten the nut three-quarters of a turn until the mark is at the three o'clock position.
10:
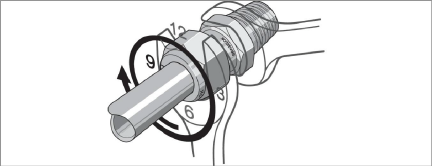
Figure 10: Tighten One and One-Quarter Turns
Swagelok tube fittings can be disassembled and reassembled many times.
Warning! Always depressurize the system before disassembling a Swagelok tube fitting.
1.Prior to disassembly, mark the tube at the back of the nut, then make a line along the nut and fitting body flats. These marks will be used during reassembly to ensure the nut is returned to its current position.
11:
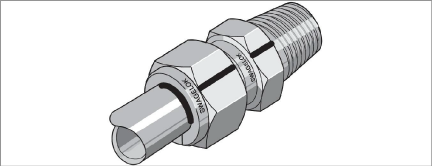
Figure 11: Marks for Reassembly
2.Disassemble the fitting.
3.Inspect the ferrules for damage and replace if necessary. If the ferrules are replaced the connector should be treated as a new assembly. Refer to the section above for installation instructions.
4.Reassemble the fitting by inserting the tube with preswaged ferrules into the fitting until the front ferrule seats against the fitting body.
12:
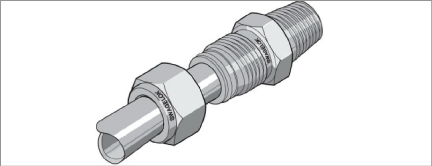
Figure 12: Ferrules Seated Against Fitting Body
5.While holding the fitting body steady, rotate the nut with a wrench to the previous position as indicated by the marks on the tube and the connector. At this point, there will be a significant increase in resistance.
6.Tighten the nut slightly.
13:
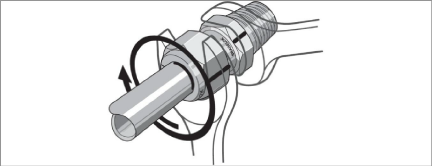
Figure 13: Tighten Nut Slightly